

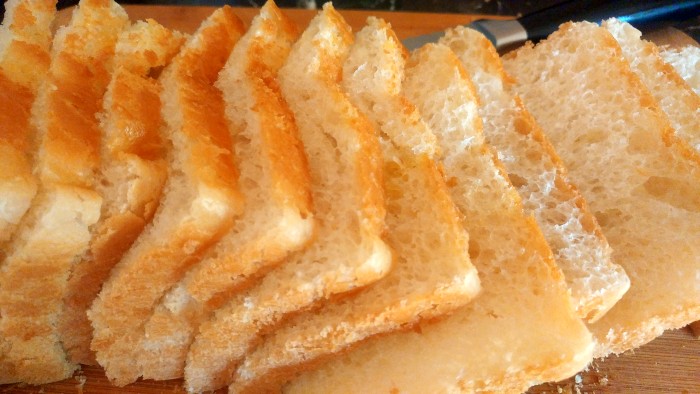
My search for the softest and fluffiest white bread ends here. The basic white bread has always alluded me. Though I have been pretty good at making rolls, baking a loaf has never been my cup of tea.
I have tried all the techniques out there on the net, including tangzhong. But I always felt my loaves lacked something, till I finally cracked it.
After looking up quite a number of videos and recipes on bread baking, reading a lot of forum discussions on bread, and wasting quite a number of loaves with my trials, I have finally settled with this recipe.
For now, this is my keeper recipe. If I happen to make any further improvements on this, I will keep you updated.
This is adapted from my basic eggless dinner roll recipe. The only real change I have made is in keeping the sponge resting for more time.
Previously I used to rest only for 10 minutes. And believe me, this one is very very close to the store-bought ones, minus the additives. It is so soft that you can have it all by itself.
Now about my pull man pan. I am not sure whether to categorize it as small, or large. Coz this one is 10½” x 4½” x 4″, but the loaf it yielded was exactly the same size as the family loaf we normally buy here.
Pull-man pans are the best if you are looking for even-sized sandwich bread. But no worries if you don’t have one, you can use your regular pan.

This is a pretty straightforward recipe, with just the absolutely necessary ingredients.
Bread is not a staple in our house. But kids find it easy to carry to school and consume, and so most of the time I am forced to buy store-bought white bread.
And looking at the long list of additives, these breads come with, I had to go back on my vow of not using APF for anything bread.
At least even if it is white bread, when you bake it yourself, you will know exactly what has gone into it.
Anything in moderation will do you no harm is my strong belief. White bread may not be bad after all, as per this report that I came across.
Also, you will become confident in baking bread, only if you master this basic bread recipe.
From here you can go healthy by trying out various combinations, like replacing half or a third of the APF with wheat flour or other flours.
So here I am, with my recipe for the basic white bread.
But before that, a word on the two major factors, that I think are very important for soft bread.
- having a loose dough when forming the sponge, as this helps the gluten to expand and stretch. Add more water if needed to make the dough loose and sticky.
- looking for a tacky dough after the second proper knead. Tacky means sticking to your hand when touched but still can be easily released, unlike a sticky dough. Tacky dough usually sticks to the bowl or counter and is not completely dry. I have found from experience that a sticky dough produces a moist crumb, which is not desirable. To achieve this you may have to knead anywhere between 8 -12 minutes.
For People who do not have a stand mixer
- Proof the yeast in a big sized bowl. Add the flour and mix up gently with a ladle or spatula for a good few minutes, till you see the dough forming strands as you mix.
- Let rise. Add the rest of the ingredients.
- Knead on the countertop adding flour in small instalments, till you get a tacky dough.
- Proceed with the recipe as given below.
Basic white Bread
Ingredients
For the sponge
- 3 cups(375g) All Purpose flour/Plain flour/Maida
- 1½ cups(300ml) water
- 1½ tsp active dry yeast
- 1 tsp honey/sugar
Rest of the ingredients
- 3 tbsp sugar(I used granulated raw sugar)
- 1 tbsp butter
- 2 tbsp coconut oil
- 1½ tsp salt
- ¼-½ cup flour to be used in kneading(I needed ⅓ cup/42g)
- butter as needed for brushing and greasing
Instructions
- In the bowl of a stand mixer, proof the yeast with honey and all of the water. Once it bubbles up, add the 3 cups of flour, all at once and knead on low speed for about 5-7 minutes, till everything is combined. The dough will be very loose and shaggy at this point.

- Cover it and let rest for ½ an hour. The dough should have increased in volume. If not let it rest for some more time.
- Next add all the rest of the ingredients with the exception of the flour and start kneading at medium speed . Keep adding the flour by tbsps as you knead, till you get a soft and supple dough, that is tacky. It should clean the sides as it kneads, though still sticks to the bottom. This will take 7-10 minutes.
- After kneading, transfer the dough to a mildly oiled counter top and knead the dough for about 2 minutes. Shape the dough into a log shape by pulling the dough and pushing it underneath to smoothen out the top. Pinch the seam and transfer to a greased bread pan.
- Let rise in a warm place, for atleast an hour, or till it springs back half way when poked.
- Bake in a preheated oven at 180°C for 40 minutes in the middle rack. This time I used my pullman bread pan 10½" x 4½" x 4", and it was perfect for this sandwich bread, exactly the size of the family loaf we get in Qatar.
- Cool down completely on a wire rack, before slicing.


Hema’s P.S
- These measurements will yield a single loaf of family-sized sandwich bread, just right for four people. Double the recipe to make two loaves or half the recipe to make a small loaf if you intend to try it out before making large batches.
- Whatever the measures, just see that after the first knead your dough is really sticky. You can add more water if needed. And after the second rise, it should be tacky, add as much flour as needed.
- The water for proofing the yeast should be warm to the extent that you can stick your fingers in, generally 110°F /43°C.
- You can reduce the amount of sugar, if you feel it’s too much or if you are looking for salt bread. But if you are looking for even a mild sweetness, this much is needed.
- You can also replace the sugar with honey or other sweeteners of your choice.
- In the 3tbsp of shortening, I have added 2tbsp coconut oil and 1tbsp butter. You can replace it totally with butter, or with any oil of your choice.
- I make it a point to knead well by hand before shaping, which re-distributes all the gases. Else I end up with unevenly formed large holes in my bread.
- Greasing your hands with butter or oil, while shaping the loaf gives a smooth finish.
- It did not strike me to brush the tops and sides of the bread with butter soon after baking. I did that the third time when I baked and I could see a great difference in the color of the crust.
- There is no need to cover the bread while cooling on the wire rack, but I prefer to put a dry cloth over it, to avoid drying out.
- The bread continues to cook even after it’s out of the oven, so wait till it cools down to room temperature.
- Head over to my baking basics page for troubleshooting, if any.
Hope your bread baking venture turns out to be successful as it was for me. I will be happy to help you if you have any queries.

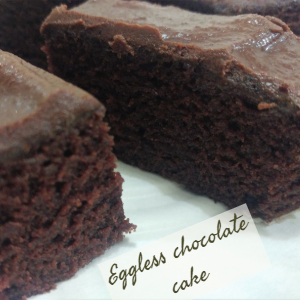
You may be interested in my other bakes


← Back to Baking recipe index page


Hema, after reading this article i was able to clear lot of my doubts regarding baking breads.Really worth reading.
Thank you jiji.