

Talk about ‘no-knead’ and you cannot help but thank Jim Lahey. He is the one who invented the no-knead technique way back in 2006 when I was “light years” away from baking 😀 . This no-knead white bread will floor you for sure.
And guess what? You don’t need a stand mixer or any fancy equipment for making this. You don’t even need to use your elbow grease. The only thing it requires apart from the ingredients and bare minimum equipment is your time and patience.
For regular bread, the flour is kneaded for quite some time to help develop the gluten strands. These form a mesh-like network that traps the carbon dioxide released by the yeast. This is what gives bread its elasticity and structure.
But in the no-knead bread, the dough is given time to let the gluten strands develop by itself. This slow rise makes the bread more flavorful and the amount of yeast used is also very less compared to the regular breads.
Please note that this article may contain affiliate links. That means I may make a commission if you click and buy, at no additional cost to you. Please see my full disclosure policy for more information
The original recipe which was published in The New York times in 2006 uses just the flour, salt, yeast, and water. Everything is simply mixed up in a bowl and let rise at room temperature for 12-18 hours.
It’s then shaped and baked in a preheated oven in a dutch oven or a cast iron pot with the lid. That is why all the no-knead breads, that you see are kind of round in shape like the artisan breads.
But I was looking to make a no-knead loaf. So I adapted a slightly different method, the one I was so used to – my no-knead pizza recipe. Pizzas are a lot easier compared to breads.
So I went in for a trial, using only 2 cups of flour, in the back of the mind planning to make croutons or breadcrumbs if the attempt failed 😀 .
The result was unbelievable, more so coz I have struggled quite a bit before I settled down with my first loaf. It vanished in minutes and my family was asking for more. Honestly, I did not expect this.
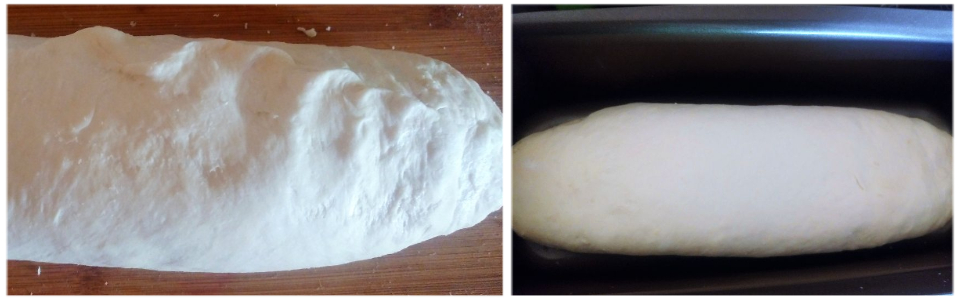
So here is what you need to do. Mix up everything and let the dough rest on the counter for an hour until it is doubled. Then refrigerate it overnight. The next morning handle the dough as our regular bread dough.
That is, knead it by folding over itself a few times, roll out and shape into a log and place it in the loaf tin to rise. It did take about 2 hours to rise, though I felt I could have kept it a bit longer.
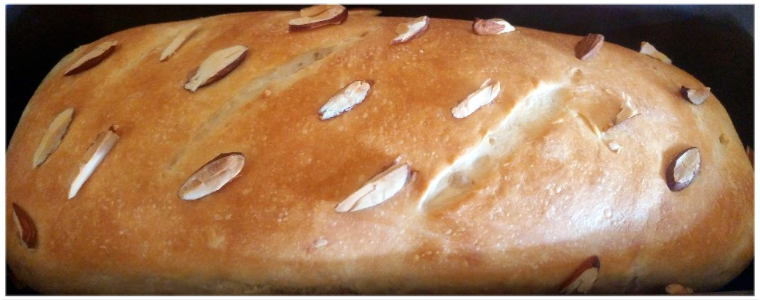
Since the dough was cool, I even tried scoring it although with the fear of collapsing the dough 😀 . Thus, the design did not come out as expected.
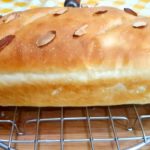
So also with the almonds that I tried to stick on top after a milk wash. But both of these will work with this dough and you can definitely try.
The ingredients also vary as I am using butter and milk too with the regular ingredients. Yeast is half the quantity of my usual bread.
I used a 26cm loaf tin, for this quantity of flour though I felt a smaller size pan would have given a taller loaf. This loaf weighed around 470g.

When baked in a 7.5″ mold
For regular loaf, you can try with 3 cups of flour, 1/2 cup water for proofing the yeast, and 1 cup milk. The cup used was a 250ml cup. Also, I will not be able to give the weight measures as this was a trial. I will update when I make it again.
This no-knead bread is a boon when you want to have fresh warm bread for breakfast. Very minimal effort and unbelievable results.
I normally start up the process around 8 or 9 pm while preparing dinner, and by the time the family is done with dinner, the dough would have risen. I just tuck it into the refrigerator and get sleeping.
The next day morning as soon as I get up I shape the loaf and let it rise. By the time the family is up its baked and ready for breakfast 🙂 .
Do give it a try, and believe me…you will stop buying bread. And do not blame me if you become a bread addict 😀 ..Seriously, it’s that good.
Over to the recipe…
No-knead white bread
Ingredients
For proofing yeast
- ⅓ cup warm water
- ½ tsp active dry yeast
- ¼ tsp sugar
Rest of the ingredients
- 2 cups all-purpose flour/maida
- ⅔ cup warm milk
- 2 tbsp melted butter/ghee
- 1 tbsp sugar
- 1 tsp salt
Instructions
- Proof the yeast with the water and sugar as given under"for proofing yeast" for 10 minutes or till the yeast blooms or becomes bubbly.

- In a bowl take the rest of the ingredients and mix the bloomed yeast also with it.
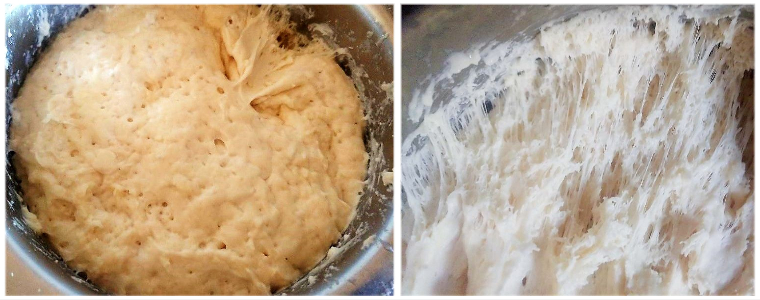
- Mix with a ladle till you do not find any dry flour around. The dough will be shaggy. If it is not add another tbsp of warm milk.
- Cover and let sit for an hour at room temperature.
- Then transfer it to the refrigerator and let it proof in there overnight, about 8 hours.
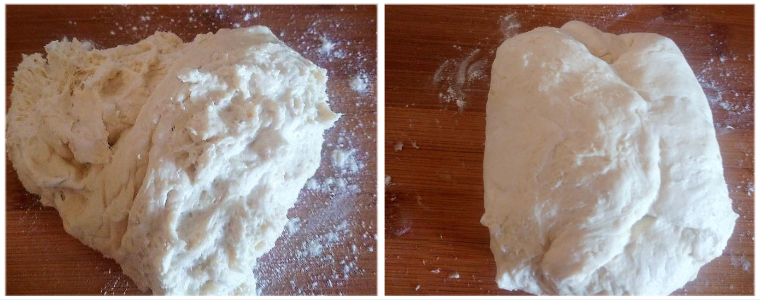
- The next day, transfer the dough to a floured counter-top and knead it a few times by folding it over itself.
- Roll it out to a rectangle and shape it into a log. Pinch the seams and transfer to a greased bread pan.
- Let rise till it doubles in size. It took about 2 hours for me. Brush the top with milk, Sprinkle some nuts or seeds and even score if you want.
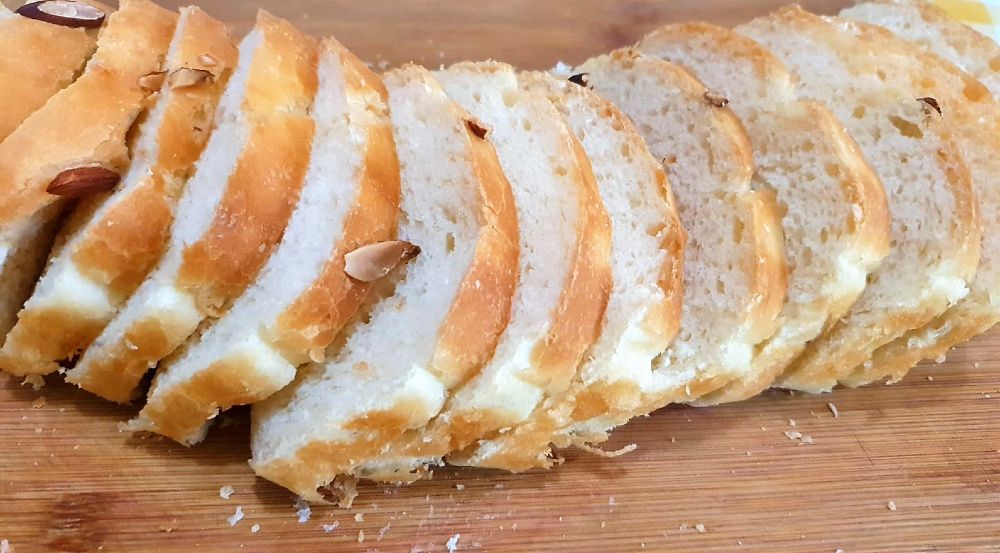
- Bake in a preheated oven in the middle rack at 180°C for 30 minutes. Brush the bread liberally with butter as soon as it's out of the oven. Cool down completely on a wire rack before slicing.
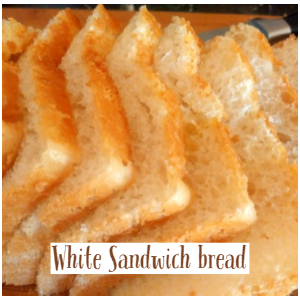
- Toast it, make it into sandwiches, have it with jam/butter, or have it as it is. You are bound to fall in love.


Hema’s P.S
- The water for proofing the yeast should be warmer than lukewarm. That is it should be hand bearably hot around 110°F /43°C.
- If the yeast does not bubble up even after 10 minutes, it means the yeast is not active or is dead. Please discard and start fresh. I had a few friends proceeding with the recipe despite the yeast not bubbling up and then asking me why their breads failed. It’s a sheer waste of your time and energy.
- The dough after mixing up will be shaggy. Do not be tempted to add more flour.
- Also, while kneading after removing from the refrigerator only add as much flour as needed to handle the dough. It will be manageable, I promise.
- The bread keeps cooking even after it is out of the oven. So wait for it to cool down before slicing. And always slice with a serrated knife for clean slices.
- I prefer to keep the bread covered with a towel while cooling so that it does not dry out.
- The dough can be refrigerated up to 3 days before baking.

Do check out my regular breads and rolls too


← Back to baking recipe Index page


Tried your bread recipe for the first time to the t and I’m in love with it…. Made it 50%apf and 50%whole wheat…. It’s amazing… Thank u
Thank you so much Anita for trying out and coming back to let me know.It means a lot😊.
Also thanx for the update on your trial with whole wheat flour.It’ll definitely help people who visit this page.
I tried with 100% ww was awesome. Thanks for the recipe.
Thank you so much Sangita for trying out and letting me know.Glad to know that it turned out well for you😍
Hi Hema,
I tried this recipe of yours and the bread was amazing.
So glad to know that Deepshikha😍. Thank you so much for coming back and letting me know.
Hello,
Wanted to ask if we are making with whole wheat do we increase water quantity.
Yes, slightly. Depends on the flour. Just see that it is sticky.